Sign up

Welcome spring! Create a stunning spring door wreath

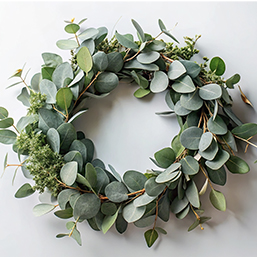
Spring is finally here and if you’re looking for an easy way to bring a little greenery into your space, a eucalyptus wreath is the perfect DIY project. It’s fresh, looks great, and smells incredible. Plus, as an added bonus, it will last for weeks and dry beautifully, making it a versatile addition to your entryways or indoors.

\n \n

Throw away any self-doubt, as the best part about this project is that you don’t need any fancy skills to make one! If you can wrap some wire and layer some leaves, you’re good to go. We’ll walk you through it step by step, and when you’re done, you’ll have a beautiful creation to be proud of!

\n

Materials 

\n

Before getting started, you’ll need to gather the following supplies:

\n
    \n
  • A wire wreath frame – 12 to 18 inches is a great size, but you can go bigger or smaller.
  • \n
  • Floral wire – thin and flexible to secure stems and wrap around the frame.
  • \n
  • Fresh eucalyptus branches – Choose two to three types for the best texture and dimension. Silver dollar, seeded, and baby blue eucalyptus all work well together.
  • \n
  • Scissors or floral snips – Sharp enough to trim stems cleanly.
  • \n
\n

How much eucalyptus should you buy? If you’re getting eucalyptus from a florist, you’ll need:

\n
    \n
  • Two to three types of eucalyptus to create depth and variety.
  • \n
  • Six to eight florist bundles in total, depending on how full you want your wreath. A good breakdown:
  • \n
  • Two to three bundles of your main eucalyptus (like silver dollar)
  • \n
  • Two bundles of a secondary type (like seeded eucalyptus)
  • \n
  • One to two bundles of an accent type (like baby blue eucalyptus or rosemary/lavender for extra texture)
  • \n
  • How big will the final wreath be? Your finished project will be four to eight inches larger than your frame size, depending on how full you make it. If you start with a 12-inch frame, expect your final wreath to be 12 to 16 inches across.
  • \n
\n

Step 1: Prep your eucalyptus 

\n

A little prep work makes all the difference when building a wreath. Here’s how to get your greenery ready:

\n
    \n
  • Trim the stems at an angle. This helps the eucalyptus absorb water if you want it to stay fresh longer.
  • \n
  • Let the stems sit in the water for about an hour or two before you start. This keeps them hydrated and flexible.
  • \n
  • Remove the bottom leaves from each stem so you have a clean section for wrapping.
  • \n
  • Cut each eucalyptus stem into smaller sections. 
  • \n
  • Aim for pieces that are six to eight inches long. This makes them easier to work with and helps create a balanced wreath. Group these cuttings according to the variety type.
  • \n
  • Let them sit out for a little while: slightly wilted eucalyptus bends easier, making it easier to work with.
  • \n
  • Keep some of the longer trimmings handy to use later as fillers if needed.
  • \n
  • Fun fact! Eucalyptus isn’t just pretty, it also helps purify the air! The natural oils in the leaves have antibacterial properties.
  • \n
\n

Step 2: Make mini bundles 

\n

Instead of attaching each eucalyptus stem one by one (which takes forever), we’re going to make small bunches to help speed things up:

\n
    \n
  • Grab four to five cut stems from one variety and arrange them into a little bouquet.
  • \n
  • Wrap floral wire around the base a few times to hold them together.
  • \n
  • Make 12 to 18 bundles, depending on how full you want your wreath.
  • \n
\n

Step 3: Attach the bundles to the wreath frame 

\n

Now that you have a table full of bundles, it’s time to build the wreath! This is where the magic happens, and everything comes together.

\n
    \n
  • Take your first eucalyptus bundle and lay it on the wire frame.
  • \n
  • Secure it by wrapping floral wire around the stems and frame a few times.
  • \n
  • Without cutting the wire, layer your next bundle slightly over the first one so it covers the stems.
  • \n
  • Keep wrapping and layering bundles in the same direction until you’ve covered the whole frame.
  • \n
\n

Step 4: Add the finishing touches

\n

At this point, your wreath is probably already looking amazing, but this is where you can add any finishing touches to make it truly yours. If you love a natural, wild look, you can let some stems stick out freely instead of trimming everything perfectly. You can also add a few dried flowers, like baby’s breath, for extra detail. Use leftover trimmings to fill any holes and ensure a full look.

\n

Fun fact! Even when eucalyptus dries out, it keeps its scent. If it starts to fade, rub the leaves between your fingers to release more of that fresh, minty aroma.

\n

Step 5: Hang it up and enjoy! 

\n

Stand back and admire your work – you did it! Now it’s time to find the perfect spot to show it off. Here are some ideal locations for your beautiful creation: 

\n
    \n
  • Front door – a classic spot that welcomes guests with a fresh, natural look.
  • \n
  • Above a mantle – adds a beautiful touch to your living space.
  • \n
  • As a table centrepiece – lay it flat and place a candle in the centre for a stunning table decoration.
  • \n
\n

Pro tip: If you want to keep your wreath fresh for as long as possible, avoid direct sunlight and mist it with water every few days.

\n


\n

Love this project but not wanting to tackle it on your own? Join a spring wreath workshop at Bloom Culture, or gather a group together for a fun evening or afternoon for private instruction in your home. Visit bloomculture.ca/workshops to learn more.

\n


\n

See our related articles:

\n

Calgary’s Child Magazine © 2025 Calgary’s Child